One of the jobs of a skirting board is to act as a barrier against wear and tear. Skirting boards are easily scuffed and scratched, particularly in high-traffic areas like hallways. For this reason, every so often, skirting boards need to be sanded and repainted to give a wall a finished look and elevate the aesthetics of a room.
You may be wondering how to sand a skirting board before you give it a lick of paint. Well, the simplest method is with a cordless sander.
Easy to operate and with many uses – purchasing a cordless sander is an excellent investment.
Follow this step-by-step guide to effectively remove the buildup of grime and layers of paint with a sander, creating a perfect surface for a fresh coat of paint.
Tools You'll Need to Sand Skirting Boards
First of all, you will need the following tools and items before you start the task of revamping your skirting boards:
- Sanding tool
- Sugar soap
- Sponge
- Dust mask
- Masking tape
- Dust or carpet protector
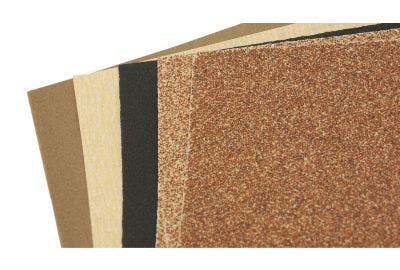
- Sandpaper
Which Are the Best Sanders to Use on a Skirting Board?
Before we detail how to sand your skirting board, let's cover the best type of sander to use.
Sanding down skirting boards with an electric sander couldn't be any easier; however, you must pick a high-quality and purpose-built tool.
The best sander for sanding skirting boards is the Mirka Cordless Sander Set With Battery and Charger.
This cordless sander enables easy manoeuvrability, meaning you don't have to worry about stray wires, and you can use it in areas that don't have a socket.
Furthermore, if you require a sander for work and travel to different locations, this one is easy to transport.
Ideal for spot repair, the Mirka cordless sander has a battery that lasts up to 16 hours and only takes 45 minutes to charge.
Alternatively, you can purchase the Mirka Random Orbit Cordless Sander Without Battery or Charger.
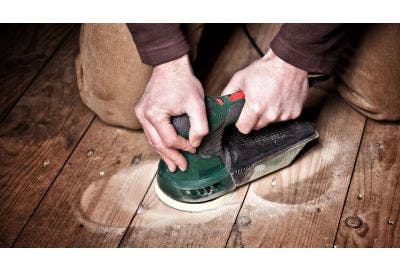
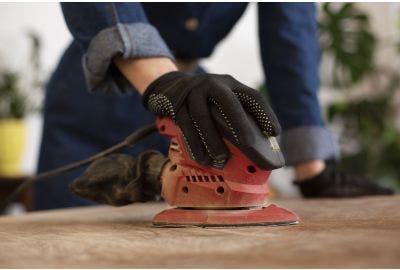
Sanding Skirting Boards Using a Cordless Sanding Tool
Once you have your tools and necessary items, you’re ready to start the task of freshening up your skirting boards.
1. Prepare the working area.
It can be very messy when paint flakes from your skirting boards, so you'll first need to clear the surrounding floor area to make room for your carpet protectors.
Even if you don't have a carpet, putting down a sheet to collect all the dust is still a good idea, making cleaning much more manageable!
You will also need enough room to work, so move any furniture out of the way if necessary.
2. Clean the skirting board.
Grease, dust, and dirt can affect your sanding results, making it essential that you clean it all off beforehand. Use sugar soap and a sponge for this job.
Sugar soap is very effective at breaking down residue. Follow the instructions on the packaging to ensure you use the product correctly.
Once you’ve removed what you can of any dirt and grease, allow your skirting boards to dry.
Next, apply masking tape to the edges of the skirting board to protect the wall and floor.
3. Smooth corners and contours.
Your cordless sander may not be able to reach all of the contours and corners of your skirting boards. In this instance, sand by hand.
Remember to wear a dust mask before you begin.
Whether you’re working with sandpaper or a cordless sander, you must always sand in the direction of the grain.
Be careful in the corners of your skirting boards because paint will likely come off easily in these areas. To prevent this, use light pressure.
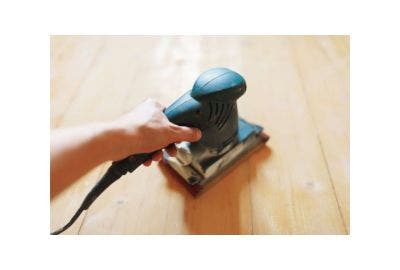
4. Lightly sand the whole skirting board by hand.
Although you will have already cleaned your skirting boards with sugar soap, this may not have removed all of the stubborn dirt.
So, with your sandpaper, lightly sand the whole skirting board.
This is a stage you shouldn’t skip, particularly if you know there are dents and chips that need to be filled; lightly sanding the skirting board by hand will make it easier for you to spot them!
5. Fill any chips or dents with filler.
As you're filling any dents, knot holes, or chips, remove the excess filler product from around the area you're perfecting – do this before it dries; otherwise, a halo will form around the hole, which will be apparent even when painted over. Then, give your filler
time to dry before you sand the skirting board.
6. Remove the top layer of paint using your cordless sanding tool.
First, remember to put on your dust mask if you removed it in the previous step.
When using your cordless sander, apply light pressure, helping it smooth out splinters or bumps without skipping them. Again, go with the grain.
Your aim should be to give your skirting board a uniform surface; however, paint needs something to adhere to, so don't strip it back entirely unless there is excessive paint buildup.
Once complete, wipe the dust away with a cloth and hoover any excess before painting.
Now you know how easy it is to use a cordless sander to prepare your skirting boards for fresh paint. If you were wondering how to sand skirting boards and door frames, a cordless sander can tackle both tasks!
A newly sanded skirting board makes light work of painting, helping improve the outcome and enhance the look of a room.
If you require other power tools to complete DIY jobs around the home or within a professional environment, explore the power tools that Heamar offers.