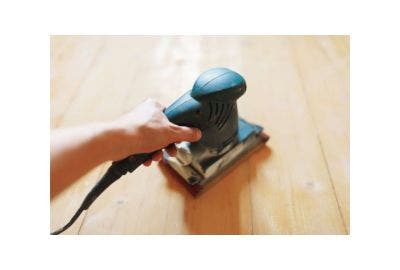
A well-maintained cordless sander ensures that you’re never stuck in the middle of a job due to performance issues. For example, failing to clean the dust system regularly can lead to motor overheating, reducing its lifespan. Regular maintenance not only extends the tool’s life but also guarantees consistent, high-quality results.
In this article, we’ll cover essential tips to help you care for your sander, focusing on cleaning, inspecting and storing it correctly. Whether you’re a professional craftsman or tradesperson, these practical maintenance practices will help with cordless sander maintenance and keep it in top condition, even in demanding environments.
Clean the Dust Collection System Regularly

Maintaining a clean dust collection system is key to ensuring your sander operates efficiently. Dust build-up can overheat the motor and damage internal components.
Begin by disconnecting the sander from its power source for safety. Remove the dust bag or canister and empty its contents. Use compressed air to clean out remaining dust, paying close attention to corners and seals. Ensure the dust seal is intact to block debris from entering the motor.
Dust Extraction System
The dust extraction system plays a critical role in keeping your sander efficient and safe. Over time, extraction ports may clog, leading to reduced suction and increased dust circulation.
Inspect the ports regularly for blockages or damage. Use a soft brush or compressed air to remove dust build-up, ensuring the ports remain clear. To maintain long-term performance, invest in compatible dust extractors designed for your sander. This not only prevents motor strain but also supports a cleaner workspace.
Inspect and Replace Sandpaper
Checking and replacing sandpaper regularly is vital for achieving consistent sanding results and protecting your sander’s motor. Worn sandpaper can cause uneven finishes and put unnecessary strain on the tool. Here are some general sandpaper replacement tips to remember.
- Inspect the sandpaper before each use, looking for signs like visible tears, frayed edges or patches with reduced grit.
- Replace it immediately if these issues are present.
- For professionals working on tough surfaces, sandpaper might need replacing every few hours, while lighter use may extend its life.
Sanding Discs

Sanding discs are critical to achieving professional sanding results. Over time, they can wear out, leading to uneven sanding and potential damage to your workpiece. Look for signs of wear such as smooth, polished patches, torn edges, or reduced grit texture. Replace worn discs promptly to maintain optimal performance.
To avoid damage, store sanding discs in a cool, dry place, away from humidity or direct sunlight. Always choose discs compatible with your sander model to ensure a secure fit and smooth operation.
Sanding Sheets

Sanding sheets are available in different grits, designed for a wide range of tasks. Inspect them regularly to identify signs of wear, such as torn edges or reduced grit sharpness, which can lead to scratches or uneven sanding.
When using sanding sheets, ensure they are properly aligned and securely attached to the sander to prevent slippage during operation. For the best results, invest in premium-quality sheets that deliver longer-lasting performance and superior finishes.
Lubricate Moving Parts
Keeping the moving parts of your sander lubricated is vital for its performance and longevity. Without lubrication, friction can cause parts like bearings and gears to wear prematurely, resulting in reduced efficiency or mechanical failure.
Always use lubricants recommended by the manufacturer to ensure compatibility. Before applying, clean the parts thoroughly to remove debris. Use a small amount of lubricant and distribute it evenly, being careful not to overapply, as excess oil can attract dust and impede performance. Wear gloves during this process and keep lubricants away from electrical components.
Regular sander lubrication keeps your tool operating smoothly and reduces the risk of costly repairs.
Check Battery Health and Charge

Maintaining the battery of your cordless sander is crucial for consistent performance. Check charge cycles regularly to prevent overcharging or deep discharging, as these can reduce battery lifespan. Inspect the battery visually for signs of wear, damage, or swelling.
To maintain good connections, clean the battery contacts with a dry cloth. Use a multimeter to verify the voltage is within the recommended range.
For storage, keep the battery in a cool, dry place at approximately 50% charge if it won’t be used for an extended period. These simple sander battery care practices help prolong its life and keep your sander ready to perform.
Store Properly
Storing your cordless sander correctly prevents damage and ensures long-term reliability. After each use, clean the tool thoroughly, removing dust and debris from surfaces and crevices. Place the sander in a protective case or cover to shield it from moisture and accidental impacts.
Store the tool in a cool, dry environment, away from direct sunlight or extreme temperatures, which can damage the motor and battery.
Using protective covers or cases helps guard against rust and wear. Proper care during storage keeps your sander in excellent condition for future use.
Conduct Routine Inspections
Routine inspections are essential for spotting potential issues before they escalate. Regularly check the following components:
- Motor: Look for signs of overheating or reduced performance.
- Electrical connections: Inspect for frayed wires or loose plugs.
- Housing and seals: Ensure there are no cracks or wear that could let dust in.
- Fasteners: Tighten any loose screws to maintain structural integrity.
If you find issues, such as overheating or unusual noises, consult an expert for professional sander care and repairs.
Keeping a checklist and scheduling regular maintenance sessions ensures your sander remains in top condition and avoids expensive repairs.
Backing Pads
Backing pads provide a stable base for your sanding discs. Over time, these pads can wear out, affecting your work quality and potentially leading to accidents.
Regularly inspect backing pads for signs of wear, such as thinning or cracks.
Replace worn pads and ensure they are compatible with your sander model and secure the backing pad before each use to prevent accidents.
Interface Pads
Interface pads cushion the sanding disc against the work surface, ensuring a smooth finish. Over time, they can wear out, losing their cushioning ability, which affects performance.
Regularly inspect pads for wear signs like compression or tears. Replace them when they no longer cushion effectively. Choose pads with the right thickness and material for your task to maintain optimal performance.
Maintaining your cordless sander with regular care ensures it performs at its best for years to come. Key practices include cleaning the dust system, replacing worn sandpaper, lubricating moving parts, and monitoring battery health. Storing your sander properly and conducting routine inspections also help prevent damage and costly repairs.
Implement these tips to avoid downtime and achieve consistent, professional results. For more tips and maintenance accessories, contact us for expert advice.


