Whether you’re a carpenter or an avid DIYer, you must conduct regular maintenance checks on your belt sander for it to work correctly, efficiently, and safely.
In this blog, we will cover how to effectively maintain your belt sander, from cleaning it to storing it.
First, we will explain what one is for those who do not already own a belt sander, enabling you to understand its usefulness and versatility.
What is a Belt Sander?

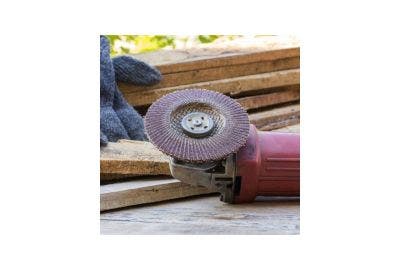
A belt sander is used for sanding and smoothing various objects, particularly in industries where rapid material removal or surface preparation is required, i.e. to remove paint or level an uneven area. Professionals often use this tool for the woodworking and metalworking industries.
Some belt sanders consist of a motor-driven belt that rotates rapidly over two drums, creating a continuous sanding surface.
However, pneumatic sanders, also known as air sanders, do not have motors, so they are often lighter and quieter than their counterparts. Instead, they consist of an air compressor.
The Mirka PBS Air Belt Sander is a pneumatic belt sander that produces low vibrations and noise levels and is ideal for welding marks and seams, general grinding, or removing paint and rust.
The belt in a sander commonly consists of abrasive material, such as sandpaper.
In addition to how they run, belt sanders come in various sizes, making it easier for people to acquire one that suits their needs.
For example, handheld portable models are easy to manoeuvre, whilst larger stationary units are designed for heavy-duty tasks.
Furthermore, some models have adjustable speed settings. This provides the user with more control over their sanding tasks.
However, like any tool, their capabilities can lessen over time, making regular maintenance essential.
Tips to Maintain your Belt Sander

1) Regularly Inspect Your Belt Sander
First, you should regularly inspect your sanding belt, testing its performance to ensure longevity and optimum results.
To conduct a thorough inspection of the tool, turn on the track of the sander. As the belt moves, carefully observe it, looking for cracks or tears.
Such damage occurs over time, particularly if the belt comes into contact with hard or sharp surfaces.
Also, look out for extreme wear in some regions of the belt. Certain parts may experience more friction than others, which will diminish the effectiveness of the sanding process, leading to uneven results.
2) Use an Air Hose

When sanding, debris or dust can get inside the drum of your belt sander, which is detrimental to its performance and durability.
Debris can cause blockages, strain the motor, and potentially lead to overheating or other malfunctions. This is why you should regularly clean your belt sander.
When you use your belt sander, remove the drum cover and thoroughly blow out any accumulated debris. Pay special attention to the fan system and motor, as these components are more susceptible to clogging and damage.
An effective way to remove debris and dust from your belt sander is to use compressed air or a tool like an air hose to dislodge the unwanted fragments from the intricate parts of the device.
Remember, dust is flammable, so it is even more vital that you remove any from your belt sander after each use.
3) Inspect the Plugs and Cable

Faulty or damaged plugs or cables can lead to electrical issues, overheating, or even electrical shock. You must regularly inspect the male and female parts of the cord and check the plug for cracks or any other signs of wear and tear.
During your inspection, carefully examine the prongs for any signs of splash marks or discolouration. These marks indicate potential problems with the wiring and can be a warning sign of electrical issues.
Additionally, be vigilant for frays or cables you cannot untwist, as these can pose a safety hazard and may indicate internal wire damage.
If you identify any cracks on the plug of your belt sander, you should replace it immediately.
4) Clean and Store the Belt Sander Properly

Follow the below steps when cleaning and storing your belt sander:
- Keep your belt sander in a dry place. Moisture can be highly damaging to power tools, so adequately clean and store your belt sander to help mitigate condensation buildup.
- Ensure you keep your sander dust-free and away from any other contaminants.
- Disassemble the sander and clean it at least every 300 hours of use. How you clean a belt sander may vary according to the type, so follow the manufacturer’s guidelines.
- When storing your sander, don’t put its weight on the wheel as this can cause flat spots.
5) Refrain from Overusing

You should avoid overusing your belt sander.
Excessively using a belt sander can result in wear and tear on the tool. If necessary, acquire a spare belt sander, mainly if you use it daily, i.e. you work in a carpentry role or are a hardwood floor specialist.
Equally, misusing your belt sander can lead to damage. For example, applying too much force when sanding can wear out the belt prematurely or even damage the tool itself.
Use the belt sander carefully, applying appropriate pressure and following recommended usage guidelines.
By following the above tips to keep your belt sander in good condition, you’ll increase the longevity of your tool and ensure optimal sanding results.
If you require any power tools or accessories, such as sanding belts and discs, Heamar offers a variety of equipment suitable for DIYer hobbyists and professionals alike.