Drilling round holes into wood is common, but what about square holes? This type of hole is often necessary for aesthetic and functional purposes, such as creating mortise and tenon joints; however, not every DIYer knows how to achieve one.
So, we have devised this guide consisting of different ways to cut a square hole into wood and the tools you’ll need, such as a bench vice.
Chisel

You can use a chisel to create a square hole in wood. Doing it this way requires patience and skill; however, if you’re on a budget, this may be the method for you.
Here’s how to use a chisel to make a square hole in wood:
Mark the area

Mark the outline of the square hole with a pencil.
Make initial cuts
Use a utility knife to make initial cuts on the outline, creating shallow grooves to guide the chisel.
Position the chisel

Position the chisel's edge just inside the scored lines, aligning it with one of the corners of the square.
Create a small recess
Gently tap the chisel's handle with a mallet or hammer to make a small recess in the wood. This helps prevent the chisel from slipping when you start removing material.
Remove material

Working from one corner, apply light pressure and push the chisel into the wood along the scored line. Make sure to keep the chisel perpendicular to the wood surface.
Continue to remove small chips of wood by applying controlled pressure and using the entire length of the chisel.
Repeat the process
Move along the scored lines, gradually removing material from each side of the square. Take your time and maintain a steady pace, ensuring the chisel stays aligned with the lines.
Test the fit
Periodically check the squareness and depth of the hole by inserting the object that will fit into it. Make any necessary adjustments by removing additional material with the chisel.
Refine the edges
Refine the hole's edges once you've removed most of the wood fragments. Use the chisel to make slight adjustments, ensuring the corners are sharp and the sides are straight.
Smooth the surface

To achieve a clean finish, use sandpaper or a file to smooth the inside surfaces of the hole. Take care not to remove more material than necessary, as it may affect the fit of the object.
Drill and Chisel

You'll achieve precise results using a drill and chisel to create a square hole. This is an effective method when you must drill a hole into thick material that a chisel alone can't handle.
Ensure you use a drill bit suitable for the material you're working with. You should use a drill bit smaller than the hole you want to create.
Draw the square
Work out the size square you need and draw this on the area you’ll be drilling.
Carefully start drilling

Drill a hole in the centre of the square.
Leave some wood by the corners
When there is a little wood on the corners of the square, stop drilling. However, if there is still a lot of wood on the corners, continue to drill but nearer to the sides.
Use the chisel

Once you have only a little wood left in the corners, put aside your drill and use the chisel to remove the remaining wood.
Smooth the hole
Sand the area to smooth the hole, removing any tiny particles.
Drill and Jigsaw

Again, with this method, you must choose a drill bit slightly smaller than the square you want to create.
Mark the square
As with the other solutions to create a square hole, mark the lines of the square with a pencil.
Start drilling
Drill a hole in the centre of the square if the hole is small. For larger holes, drill into each corner of the square.
Place your jigsaw in a hole
Use either the hole in the centre or one of the corner holes as your starting point for the jigsaw. Place the jigsaw blade in the hole, making contact with the back surface.
Cut with the jigsaw

Cut along the marked lines, staying within the square at all times.
Smooth the area
Using sandpaper, sand away any remaining chunks of material to neaten the square.
Leather Square Hole Punch

Consider using a leather square hole punch with a hammer for a more straightforward way to create a square hole. This type of tool is also inexpensive, making it easily accessible.
Mark the location
Use a pencil to mark the location of the square.
Select a square hole punch size
You should choose an appropriate square hole punch size and place it on the marked location.
Use a hammer
Tap the tool several times until it penetrates and sinks into the wood.
Insert your drill

Drill a hole through the square hole punch. A drill can be inserted via an aperture at the top of the case, providing a convenient and accessible entry point for the drilling process.
Return to hammering
Hammer the square hole punch deeper into the wood so that the sharp edges cut away the wood, forming the hole walls.
Hacksaw

Another popular method to create a square hole in wood is using a hacksaw.
Mark the square
As with the other methods, mark the location with a pencil.
Drill
Using a drill bit slightly larger than the width of your hacksaw blade, drill four holes into each corner of the square.
Insert the blade
Select one of the holes you’ve drilled and insert the hacksaw blade.
Start sawing

Saw along one side of the square, using long, steady strokes. Once you have completed one side, remove the blade and insert it through the adjacent hole to continue sawing along the side. Repeat the process until you have cut along all four sides of the square.
Remove any remaining wood
Use a chisel to remove any remaining wood and refine the edges of the square hole. You can also use sandpaper to smooth the area.
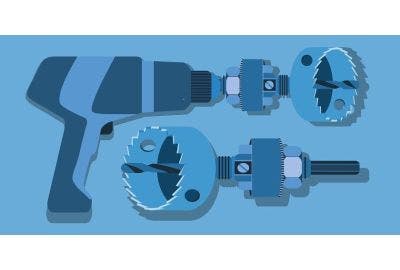
Square Drill Bit

Our final method to create a square hole is by using a square hole drill bit.
Most professionals will create a square hole this way because it is a quick and accurate method.
You will also need a mortise machine, an extra expense for a tool you may use sparingly; however, the cost may be worthwhile if you're an avid DIYer or require the tool for your job.
Mark the location
Draw the square onto the wood, ensuring you use accurate measurements.
Select a square drill bit
Pick a square drill bit to match the desired size of the square hole.
Set up the mortise machine

Attach the square drill bit to the machine’s chuck.
Adjust the machine
Adjust the depth and position of the mortise machine's fence or table to align with the marked outline of the square hole. This ensures the hole will be drilled accurately and at the correct depth.
Secure the wood
Position the wood piece securely on the mortise machine's table or work surface, ensuring it is clamped or held firmly in place.
Turn on the mortise machine
Once you have turned on the mortise machine, carefully guide the square drill bit towards the wood surface, aligning it with one corner of the marked square.
Start using the mortise machine

Apply steady and controlled downward pressure to start drilling. Use the mortise machine's handle or controls to move the drill bit along the marked outline, cutting out the square shape. Continue drilling until the square hole reaches the desired depth.
Refine the hole if necessary
If any adjustments or refinements are needed, use a chisel or sandpaper to clean up the edges and corners of the square.
Now you know several ways to create a square hole in wood. Choose the best method for you and apply the proper technique to achieve accurate and clean results.
As with any tasks that require you to use tools, you should ensure that you wear appropriate personal protective equipment (PPE), such as goggles and gloves.
Heamar stocks a wide range of tools, including hand tools, that every DIY enthusiast should have in their tool collection.