This article aims to demystify the process, providing you with the easiest way to hang a shelf.
Suppose you're a DIY beginner stepping into home renovations - we'll guide you through the essential steps and tools for the job to ensure your shelving project is a success.
What You’ll Need
- Spirit Level
- Stud Finder
- Drill and Screws
- Tape Measure
- Wall Anchors
- Screwdriver and Anchoring Tools
Step 1 - Gather Your Materials and Tools
Gathering your materials and tools before commencing your shelf installation is paramount for a seamless and efficient process, ensuring every step proceeds without a hitch.
To successfully hang a shelf, the essentials include brackets, screws, a spirit level, a screwdriver, and a drill.
Selecting the appropriate size screws and brackets is crucial to adequately support the shelf's weight and its contents, preventing any potential mishaps.
Additionally, wearing safety gear such as goggles and gloves is imperative to shield yourself from any unforeseen accidents during the installation process.
It's also vital to clear the installation area of any hazards, creating a safe working environment.
This meticulous preparation not only guarantees a smooth installation process but also protects your well-being, empowering you to undertake the task with confidence and ease, ensuring a successful and satisfying outcome.
Step 2 - Locate the Ideal Spot for Your Shelf
Finding studs in the wall is critical for providing your shelf with maximum support, particularly if it will bear considerable weight.
This is where a stud finder, becomes indispensable, enabling you to securely anchor the shelf brackets into the wall's framework.
Additionally, using a spirit level ensures your shelf is perfectly horizontal, a vital step for both aesthetic appeal and practical use.
It's also important to consider the weight of the items you plan to place on the shelf.
Heavier items require more robust support, influencing not just the choice of shelf location but also the type and number of supports needed.
This careful planning ensures your shelf is both functional and safely installed.
Step 3 - Measure and Mark with Precision
Accurate measurement of wall space and shelf dimensions is paramount to ensure a perfect fit.
Begin by using a tape measure to assess the area where the shelf will be placed. Heamar offers precision tools ideal for this task.
Once you've determined the desired location, use a pencil or marker to lightly mark the exact spots on the wall where the brackets will be installed.
This step is crucial for visualising the shelf's placement before making any permanent changes.
Always double-check your measurements before drilling; even a small discrepancy can result in a shelf that's not level.
Taking the time to measure accurately guarantees a successful and aesthetically pleasing installation, ensuring your shelf is both functional and aligned perfectly with your decor.
Step 4 - Install the Shelf Brackets
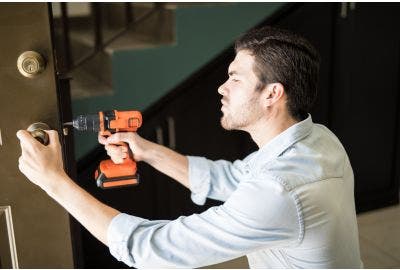
Using a drill and screws to securely attach the brackets to the wall is a pivotal step in ensuring your shelf has a sturdy foundation.
For installations where wall studs aren't available, wall anchors become essential.
When drilling, start with a smaller pilot hole before using the appropriately sized screw and anchor; this ensures a tight fit.
Wall anchors expand within the hole, providing additional grip for the screws.
To ensure the brackets are installed firmly, apply even pressure when screwing them in place.
Check for wobbliness by gently applying pressure to the bracket; it should remain immovable.
This technique guarantees that your shelf will be securely mounted, offering peace of mind that it won't come loose over time.
Step 5 - Attach the Shelf and Final Touches
After securing the brackets, place the shelf on top, ensuring it's evenly positioned, and secure it with screws or fasteners that are suitable for your shelf’s material.
Test the shelf’s stability by gently applying weight, ensuring it doesn’t sag or tilt, indicating it can support the intended load.
For a refined look, consider painting the shelf or applying a finish that matches your decor.
Cover screw heads with decorative caps or matching paint for a seamless appearance.
These steps not only ensure your shelf is functional and stable but also enhance its aesthetic appeal, blending beautifully with your space.
Putting up a shelf, particularly as a beginner is a really rewarding venture, so make it as easy as possible with the correct hand tools.
Heamar's extensive selection caters to every aspect of at-home DIY projects, ensuring you have access to the highest quality equipment.
If you want the very best in quality, then explore our extensive range, at Heamar, we have the perfect tools to bring your home improvement visions to life.


