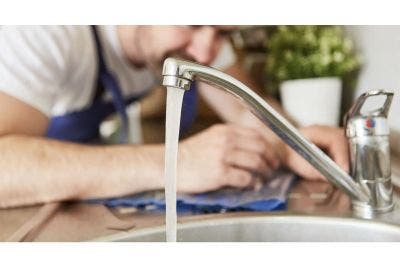
Mixer taps are popular in many households due to their convenience and modern design. However, like any plumbing fixture, they can develop issues over time, such as leaks caused by a worn washer. Regularly replacing the washer in your mixer tap can prevent leaks and extend its lifespan.
This guide provides step-by-step instructions on how to change a washer on a mixer tap, making it manageable for homeowners, DIY enthusiasts, and amateur plumbers. With the right tools and a bit of patience, you can save time and money by tackling this common household repair yourself.
What Tools Do I Need to Change a Washer on a Mixer Tap?
Changing a washer on a mixer tap requires a few essential tools. Here’s a detailed list:
- Adjustable Spanner: A versatile tool for loosening and tightening various parts.
- Screwdrivers: Both flathead and Phillips screwdrivers are needed for removing screws.
- Replacement Washer: Ensure it is the correct size for your specific tap model.
- Cloth: Useful for catching drips and protecting surfaces.
- Plumber’s Tape: Optional, but can help create a better seal on threaded connections.
- Penetrating Oil: Handy for loosening stuck parts.
For quality tools, consider brands known for durability. Stores like Heamar offer a wide range of tools, including the essential ratchet tap holder. Having the right tools is key to successfully changing a washer on a mixer tap.
How Do I Know If the Washer Needs to Be Replaced?
Identifying when a washer needs to be replaced is essential for maintaining the functionality of your mixer tap. Common signs of a faulty washer include:
- Dripping Tap: A constant drip, even when the tap is off, indicates the washer is worn out and no longer sealing properly.
- Reduced Water Flow: A significant drop in water flow may be due to a damaged washer obstructing the flow.
- Difficulty Turning the Tap: A hard or damaged washer can make the tap difficult to turn.
To inspect the washer, follow these steps:
- Turn off the Water Supply: As described earlier.
- Disassemble the Tap: Remove the tap handle and valve cover.
- Inspect the Washer: Look for cracks, thinning, or a hard texture.
Regular inspections can help avoid sudden leaks and keep your tap in optimal condition.
Can I Change the Washer Without Turning Off the Water Supply?

Changing a washer without turning off the water supply is not advisable. Here’s why:
- Prevent Flooding: Attempting to change the washer without shutting off the water risks causing a flood.
- Safety: High water pressure can cause sudden bursts, potentially leading to injury.
- Proper Installation: Turning off the water allows for precise work without the pressure of flowing water.
Always turn off the water supply before attempting to change a washer on a mixer tap.
Steps to Change a Washer on a Mixer Tap
1. Gather Necessary Tools and Materials
Before starting, gather all the tools and materials you'll need: an adjustable spanner, a screwdriver, and a replacement washer. A cloth for catching drips and optional items like plumber’s tape and penetrating oil are also useful.
Having everything ready at the start will make the process smoother and prevent interruptions. Choose a high-quality washer compatible with your mixer tap for a proper fit and long-lasting repair.
2. Turn Off the Water Supply
Locate the shut-off valves under your sink and turn them off to stop the water flow. Turn off both the hot and cold water supplies to avoid any leakage while working. After closing the valves, confirm the water is off by turning the mixer tap on. This step is essential to prevent accidental flooding or water damage during the repair.
3. Drain the Tap
Open the mixer tap to release any remaining water. Use a cloth to catch drips and protect the area around the sink. Ensuring the tap is fully drained will make the removal of parts easier and prevent any mess.
Once the tap is dry, you can proceed with the next step.
4. Remove the Tap Handle
To access the washer, first remove the tap handle. Locate the screw holding the handle in place, often hidden under a decorative cap. Gently pry off the cap with a flathead screwdriver, being careful not to scratch the surface. Once the cap is removed, use the appropriate screwdriver to unscrew the handle and gently lift it off. If the handle is stuck, apply a little penetrating oil and let it sit before trying again. This step requires careful handling to avoid damaging any parts.
5. Unscrew the Valve Cover
With the tap handle removed, unscrew the valve cover. Use an adjustable spanner to loosen the cover by turning it anticlockwise. If the cover is stuck, apply penetrating oil and let it sit for a few minutes to help loosen it. Handle the cover gently to avoid damage. Once loosened, remove the valve cover completely, exposing the valve assembly where the washer is located.
6. Remove the Old Washer
Now that the valve cover is removed, you can access the washer. It is typically secured by a small screw within the valve assembly. Use a spanner to carefully unscrew and remove the washer. Check the washer's condition for signs of wear, such as cracks or thinning. Keep the old washer handy to match the new one in size and thickness. This step is crucial for resolving leaks and restoring the tap's proper function.
7. Install the New Washer
Ensure the replacement washer matches the size and thickness of the old one. Place the new washer in the same position within the valve assembly and secure it with the small screw, being careful not to over-tighten. Make sure the washer sits flat and snugly in place to provide a good seal. This step is essential to prevent future leaks and ensure the tap functions properly.
8. Reassemble the Tap
With the new washer installed, carefully reassemble the tap. Start by placing the valve cover back onto the valve assembly and tightening it securely with the adjustable spanner, avoiding over-tightening. Align the tap handle with the valve stem, gently place it back in position, and secure it with the screw. If the handle had a decorative cap, snap it back into place. Check that all parts are aligned and functioning smoothly.
9. Turn the Water Supply Back On
Gradually turn the water supply back on by slowly opening the shut-off valves under the sink. Monitor the tap as you turn the valves to check for any immediate leaks. If the water flows smoothly without any drips, the installation is successful. Take your time during this step to confirm everything is functioning properly.
10. Test the Tap for Leaks
With the water supply back on, test the tap for leaks. Turn the mixer tap on and off several times, observing for any drips around the base and handle. If you notice any minor leaks, tighten the components slightly. If leaks persist, disassemble the tap to check for misaligned parts or improper installation. Confirming the tap operates smoothly and without leaks is key to a successful repair.
What Should I Do If the Tap Still Leaks After Changing the Washer?

If your tap still leaks after changing the washer, here’s a step-by-step troubleshooting guide:
- Check for Proper Installation: Verify that the washer is correctly seated and secured.
- Inspect Other Components: Examine the valve seat and other internal parts for wear.
- Tighten Connections: Ensure all screws and fittings are properly tightened.
- Use Plumber’s Tape: If threads are worn, applying plumber’s tape can help create a better seal.
- Replace Other Seals: Check if there are additional seals or O-rings that might need replacing.
If the tap still leaks after these steps, consider seeking professional help. Persistent leaks might indicate a more complex issue requiring specialised tools or expertise.
This guide has equipped you with a clear, step-by-step process to confidently change a washer on your mixer tap—a straightforward DIY task for any homeowner or DIY enthusiast. By following these instructions, you can not only extend the life of your tap but also save both time and money on repairs.
For top-quality tools and personalised advice, take a look further around our Heamar website or reach out to contact us directly for expert support and guidance. We're here to help you tackle all your home improvement projects with confidence.